Socialize
Though I’ve blogged on the subject before, I never really got deep down in the nitty gritty of bokeh panoramas. My passion for the technique has seen a comeback, so this will be the first of a small series documenting how to wield this awesome method!
First things first…
What’s a Bokeh Panorama*?
To best understand the beauty of bokeh panoramas, take into account this common predicament…
You’re out on a shoot with a fast telephoto lens and want to capture a scene that can’t quite fit in your viewfinder. You could swap out for a wide angle lens, but you’ll lose the narrow depth-of-field (DoF) of your telephoto lens.
By employing the basic idea of a panorama — that is, stitching together a series of overlapping photographs to create a wider field of view (FoV) — and executing it with a mid-range or telephoto lens, you get a bokeh panorama. All the perks of a wider angle lens, but with the glory of a telephoto lens: Bokeh!
* You may be more familiar with the term Brenizer Method, named after Ryan Brenizer who popularized bokeh panoramas amongst the wedding and portrait communities.
For the Visual Learners
Below are some examples I prepared for this post. If you’re on Flickr, I also have a set for bokeh panoramas.

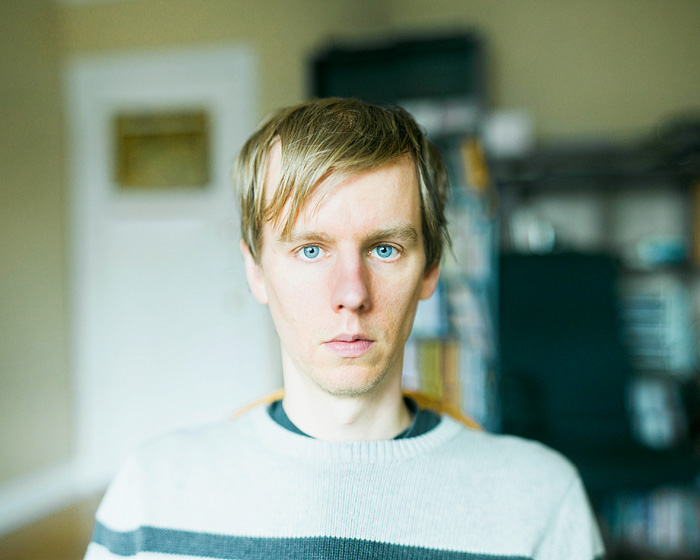
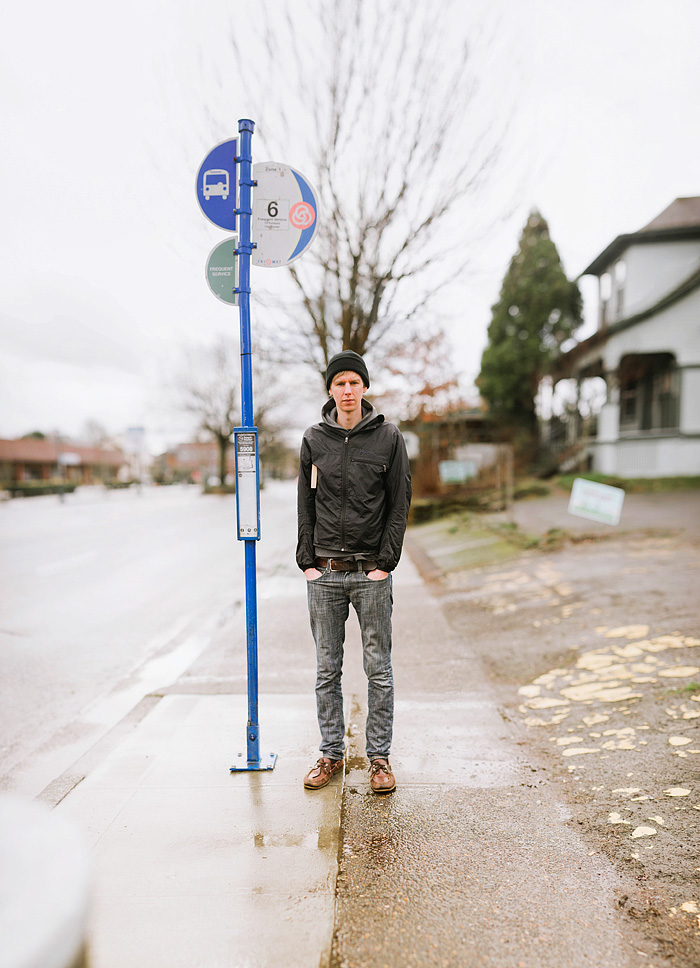

By stitching together several photos I was able to achieve a much more shallow DoF as well as a FoV that would’ve been otherwise impossible with my given equipment. For example, in the first panorama I was sitting at a small table with an 85mm lens. In a single frame I only captured a tight crop of my subject’s face from the neck up. But with 14 frames stitched together, I got the whole scene.
Delicious DoF aside, that’s what I really love the most about bokeh panoramas — they take an impossible situation, and make it possible.
* * *
I’m going to leave it at that for now. In the next installment I’ll go over what you need and how to shoot them, and then I’ll post about putting all the pieces together.
If you have any particular question about bokeh panoramas that you’d like to have addressed, feel free to leave a comment below or email me and I’ll do my best to answer it for you!
[…] week I gave a brief introduction to the bokeh panorama — aka the “Brenizer Method” — for those who weren’t already familiar. […]