Socialize
Last week I gave a brief introduction to the bokeh panorama — aka the “Brenizer Method” — for those who weren’t already familiar. This week I’m going to dig into the actual shooting method and how to piece it all together.
Review
First, I want to give you a better idea about what makes the bokeh panorama so special. It’s easy enough to look at one and think, “Okay, crazy DoF, got it!” My last post had many samples that did just that, but in retrospect, I think an even better way to persuade folks to try out this technique is to look at a side-by-side comparison.
Take yesterday’s Caturday spotlight, Griffin, for example.
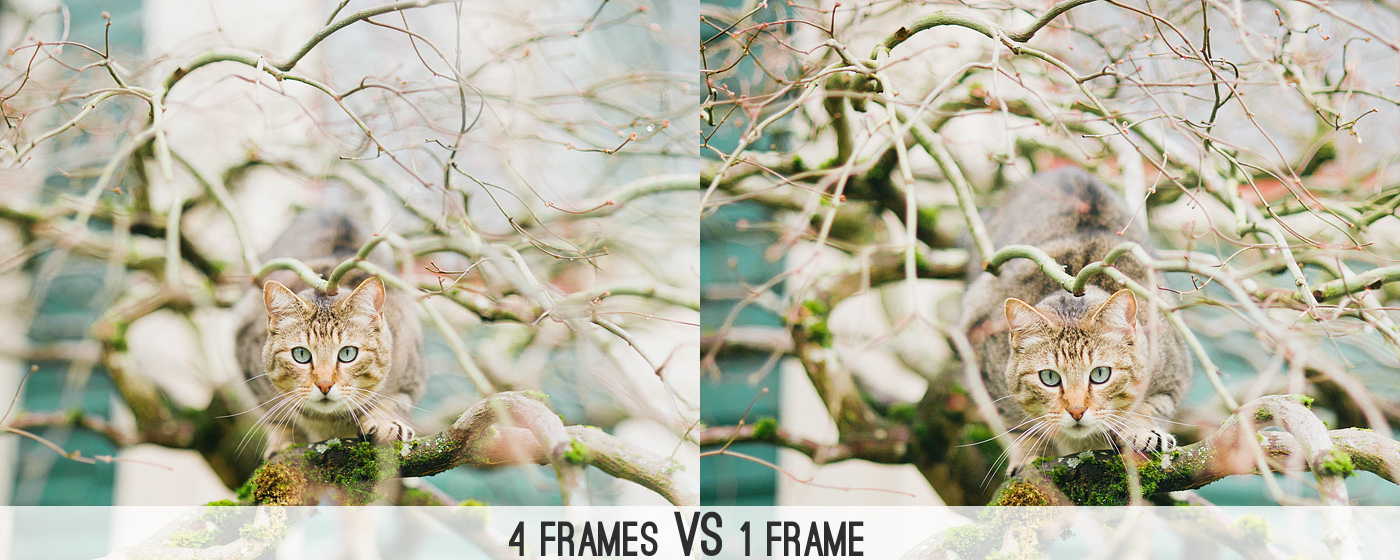
The photo on the left is a stitch made while I was considerably close to Griff (he totally said I could call him that!). The photo on the right was made by backing up a few steps so that I could capture the same scene with the same lens. Technically, everything about these photos is the same — camera, lens, settings, etc.
In this case, the incredibly narrow DoF actually works beyond achieving a desired aesthetic — all those branches make the scene awfully busy, but with less in focus, it’s easier to concentrate on what matters: Griff!
Basic Technique
The keys to executing a flawless bokeh panorama are steady footing, a somewhat motionless subject and shooting in complete Manual mode. This means turning off auto-focus, too. You want all your settings to be exactly the same — shutter speed, aperture and white balance — so that the end result is one, cohesive image. Funky stuff happens when you forget one of those steps.
Possibly more important than any of that, though, is pre-visualization. I go into each bokeh panorama with a game plan of where I’ll be shooting, and how, so I don’t miss anything. You might feel silly, but consider doing a little bit of this at first.
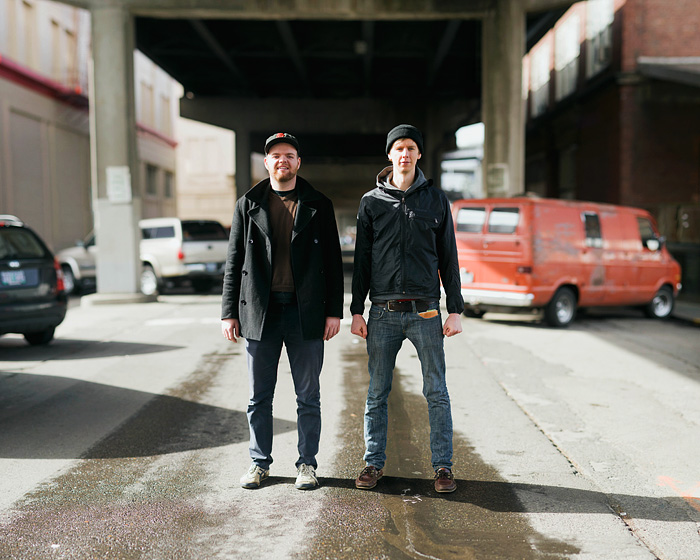
Usually, with inanimate objects, I’ll start in one corner of the pre-visualized composition and work my way through the grid. If my subject is prone to moving, however, it’s important that I shoot their body first, before moving on to the environment surrounding them. So, instead of sticking to a completely orderly grid, what I like to do is shoot the head, torso and feet first and then move to the edges. Like this:
Notice how the boxes in the grid aren’t equal sizes? This is to demonstrate how much I overlap each frame. Where the “2” shows a full-size frame from my camera, the rest of the grid overlaps each other to ensure there are no gaps in my composition.
For beginners or subjects that have a hard time staying still, you can choose to shoot vertical frames. Start with one shot that captures your subject from head to toe, then move to the edges.
Mind the Gap
I want to drive this point home, because there really isn’t anything worse that can happen than coming home and discovering you missed a spot. Photoshop trickery can save the day on the occasion that you missed a corner of the sky, or a patch of concrete, but more often a bokeh panorama with gaps will need to be cropped or trashed.
Here’s an example of a time when I was a little too careless with my grid:
So remember: Pre-visualize your end product, and overlap, overlap, overlap!
Checklist For Success
- Pre-visualize your composition.
- OPTIONAL: Switch to JPG. This will save you time when you’re just testing the waters!
- Put your camera into manual mode and set Exposure, Aperture and White Balance.
- Use Auto-Focus (AF) to zero in on your target, then throw it into Manual Focus (MF).
- OPTIONAL: Using back-button AF is great for bokeh panoramas. You can get your target locked in fast and easy, but releasing the shutter won’t trip up your focus.
- Keep your footing completely still, and only tilt your hands/camera to capture the scene.
- If shooting a human, begin with the head, torsos and feet. Then move to the edges.
- If shooting a cat… Be patient. Then be quick. =^..^=
- Make sure to overlap each frame considerably, either by 1/3 or 1/2.
- If you edit the files before stitching them together, apply the same exact changes to each frame.
- OPTIONAL: If shooting more than one bokeh panorama, fire off a frame with the lens cap on, or with your hand in front of the lens between scenes. When you get home it’ll be easier to tell where one set ends and another begins.
Completing The Puzzle
Once they’re loaded to your computer, you’ll have a variety of options for merging the photos into a single scene.
- Photoshop — If you already own Photoshop, you’ll need to look no further than File > Automate > Photomerge.
- AutoStitch — The best of the bunch because it’s free! You’ll have relatively little control over the final product, but it’s as easy as launching the program, loading up all the files and then making yourself a snack while AutoStitch does its thang.
- Autopano Pro/Giga — This is some seriously sophisticated stitching software (say that 10 times fast!). You can edit RAW files in Bridge and then import them directly into Autopano. No need to edit RAW files, open in Photoshop, save as JPG and then load them. Of course, with serious software comes a serious price tag. Ouch.
- Hugin — I’ve never used this software, but it’s free and also compatible with Macs. So if you don’t have Photoshop and aren’t running Windows, this is the program for you!
Remember… Baby Steps!
It’s really easy to go hog wild when you’re snapping away at a scene, but Griffin’s portrait is proof that you don’t need a lot of shots to create a stunning bokeh panorama. Start out by breaking your composition up into 4 frames. It’ll be much easier to pre-visualize (think of it as 4 hemispheres!), and your computer will thank you when it’s processing all those files! :)
Need Some Inspiration?
The Brenizer Method‘s Flickr Pool is both incredibly active and also brimming with amazing work. I keep my bokeh panorama uploads in a Flickr set. And, of course, you can always visit Ryan Brenizer’s blog for some stunning bokeh panoramas taken at weddings.
That’s It!
Next week I’ll go over troubleshooting, and what to do when problems occur. Of course, if you have any questions right now just drop me a line in the comments or by email and I’ll see what I can do. Now go have some fun!
[…] going to leave it at that for now. In the next installment I’ll go over what you need and how to shoot them, and then I’ll post about putting all […]