Socialize
Having recently graduated from college and moving away, I thought I’d never shoot film again. But with recommendation from a checker at Whole Foods, I’ve learned that Blue Moon Camera in St. John’s is a great place to get my film developed, and I love being a supporter of their business.
Eventually that led to buying a scanner, because I like to pretend I’m a minimalist (the clutter of knick knacks and doodah on every available shelf in the apartment says otherwise…) and the thought of finding a place to put yet more boxes of prints made my stomach lurch.
So, here’s a short tutorial to show how easy it is to turn your computer into a digital darkroom, in light of losing access to a real one. This first post will deal with removing dust and scratches.

This is the original photo, cropped and color balanced, but otherwise straight off the scanning bed.
Open up the file using ACR (Adobe Camera Raw). A common misconception that even I was under until sometime last year was that you had to shoot in RAW to take advantage of Photoshop’s ACR tools. But, JPG shooters (and film scanners!) are welcome, too, so long as you have CS3 or higher.
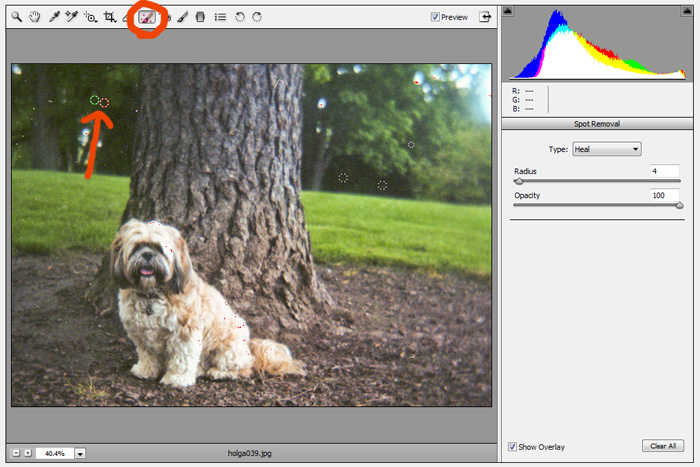
Select the Spot Removal tool, between the Straighten and Red Eye Removal tools. This is much like the Clone/Healing stamp in Photoshop, but more efficient.
Find a pesky speck of dust and click on it. The red circle is where you are healing, and the green circle is what you are using to heal with. You can select the edges of the circle to make them smaller or larger – or just hold your click and drag.
Also, you can move the green circle around to manually select what part of the image you’d like to duplicate. Every once in awhile ACR makes a bad decision, but not often – usually just when hard edges are involved.
If you have a lot of dust that’s the same size, ACR will keep your previous setting and you can just go click happy on the image.
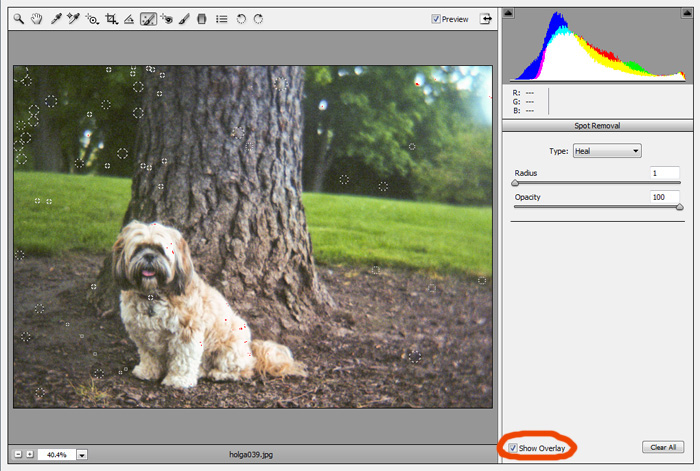
When you’re done, your screen will look something like this. Though, I prefer to work with the Overlay setting turned off, so that it’s easier to see the remaining dust.
You can see I also got rid of that bit of bokeh in the top left corner – this is a good method for getting rid of distracting elements of a photo, too, though it gets more difficult the more in-focus it is.
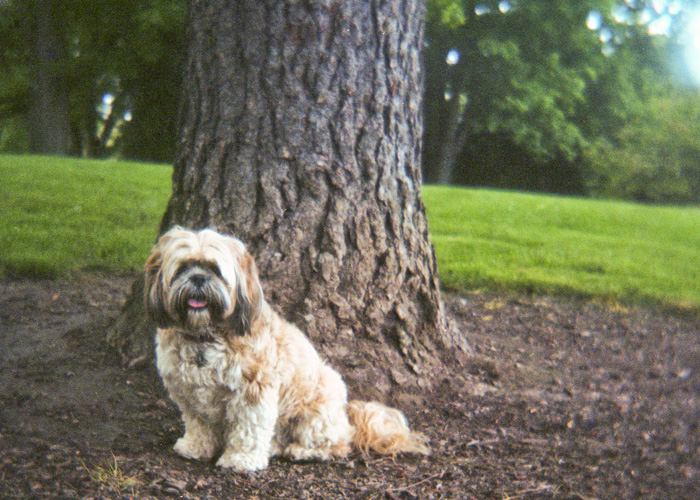
And this is what I’m left with. Ta-da!
Alternatively, you can use the aforementioned Clone stamp in Photoshop, or you could just take care of your negs and invest in some canned air. ;)
Camera: Holga 120s
Film: Kodak Portra 160NC
Scanned from a negative developed by Blue Moon Camera & Machine.
Film: Kodak Portra 160NC
Scanned from a negative developed by Blue Moon Camera & Machine.
Hi Kim! Just curious on what film scanner you use.